Table of Contents
Importing Photos Into Picasa 3
Overview
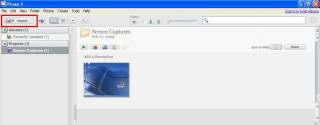
In order to edit your photos, you must first import them into the software.
Picasa supports importing from:
- CD/DVD
- Digital Camera
- Webcam
- Scanner
- Removable Hard drive / Thumb drive
- Camera Phone
CD/DVD
Insert the CD/DVD into your computer.
- Enter a folder name for the photos. You can also specify an alternate destination for the files, or enter a place taken, date, and description.
- Click Finish.
Digital Camera
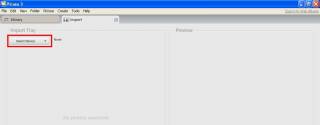
- Connect your camera or memory card to the computer.
- Your computer may prompt you to select a program to download your photos. After selecting Picasa, thumbnails of your photos should display in the Import Tray. The photos will be divided into groups based on the time period in which you used your camera. If this is the case, please skip to step five.
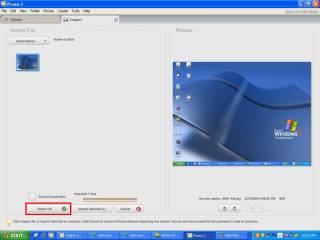
- Click Import All to copy all photos to your computer. Alternatively you can choose the photos you'd like to import and click the Import Selected button. Use these methods to choose your photos:
- Click on the clock icon to select all photos in a given time period.
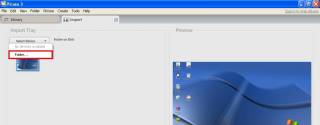
- Choose the destination location for your imported photos. The photos will be placed in a new folder in your chosen directory. Enter a name for the exported folder. You can also enter location, date, and descriptive information for your photos.
- In the 'After copying, do this with my camera or card' section, select one of the following options:
- 'Do nothing': The pictures remain on your camera and memory card.
- 'Safe delete': Only pictures that are imported into Picasa will be deleted from your camera and memory card.
- 'Wipe the card': All pictures that are found on your camera or memory card will be deleted. This option is only available if you click the Import all button.
- Click Finish.
Following the import, your photos will be saved to your computer in the folder name and location that you specified. Make sure the Picasa Folder Manager is set to scan the folder in which the photo was saved.
Webcam
Using your webcam, you can capture video or stills from within Picasa, and import them in the same instant:
- Make sure your webcam is plugged in and fully operational.
- Click the Webcam Capture button on the top button bar. This will open the Capture box.
- To take a still photo, click the Camera button. To take a video, click the Record button to start and the Stop button to end. All videos and still photos from the Webcam Capture tool will be saved in the 'Captured Videos' folder.
You can adjust your video and audio recording tools, in addition to the size of the image captured, by clicking the Settings button in the Capture box.
Scanner
You can import scanned images by taking the following steps:
- A dialog will appear and prompt you to initiate the scan. When the scan is complete, the files are sent to the Import Tray in Picasa.
- Enter a folder name for the photos. You can also specify an alternate destination for the files, or enter a place taken, date, and description.
- Click Finish.
Removable Hard drive / Thumb drive
- Click Import All to copy all photos to your computer. Alternatively you can choose the photos you'd like to import and click the Import Selected button. Use these methods to choose your photos:
- Click on the clock icon to select all photos in a given time period.
- Type the name of the folder you wish to put these pictures in. Next, choose where you would like this folder to be placed.(The default option of My Pictures is recommended) You may also enter location, date, and description for your photos.
- Click Finish.
Following the import, your photos will be saved to your computer in the folder name and location that you specified. Make sure the Picasa Folder Manager is set to scan the folder in which the photo was saved.
Camera Phone
- To import photos from your camera phone, you'll first need to transfer those photos to your computer using your device's normal transfer mechanism, like a USB cord.
- Save your files to your computer.
Picasa has TWAIN and WIA support for importing photos, which means that if your mobile phone has this type of support, you may be able to import directly by clicking the Import button in Picasa. Please check your mobile phone's help resources for more information.


